One of the most significant transformations you can make to your home is the installation of roof lanterns, which fill formerly dark areas with natural light and architectural grandeur. Many homeowners, however, are apprehensive about the installation process and its potential effects on their everyday life. To make sure everything goes successfully during the installation of roof lanterns, it’s helpful to know what to expect in beforehand.
Getting roof lanterns installed on your home is an ongoing process that starts long before the actual installation day. During the first consultation, experts will come to your house to determine if the roof lanterns can be installed in the place you have selected. Roof lanterns necessitate strong structural support, therefore it’s important to make sure the current roof can handle the extra weight and make the appropriate adjustments. In order to ensure the safe installation of your new roof lanterns, the surveyor will measure everything carefully, check the joists and determine if any further steelwork is necessary.
Technical drawings and comprehensive quotes will be sent to you after the survey, outlining the specifics of the roof lanterns’ integration with your current structure. In order to get the building regulations approval that is needed for this kind of installation in the UK, this paperwork is crucial. Even though it may take many weeks, most respectable installers will take care of the application to the building rules. It is crucial to be patient during this regulatory step while arranging for roof lanterns, as the building control inspector will need to inspect the work at various stages.
Preparation can start once all necessary approvals have been obtained. You could anticipate a little disturbance to your regular schedule prior to the arrival of the installation crew. Please remove any furniture from the area below the planned installation of the roof lanterns. Additionally, you might wish to safeguard important possessions in other rooms from dust that may settle there. Installers take great pains to avoid making a mess when they cut through a roof, but it’s inevitable. While having roof lanterns placed, many homeowners opt to temporarily move to a different area of the house or even go somewhere else during the most disturbing parts.
It usually takes two to five days to install roof lanterns, though this might vary greatly based on the project’s size and intricacy. The installation crew will set up scaffolding or other access equipment and set up their workplace on the first day. When working at height, safety is of the utmost importance, thus you can be confident that there will be extensive safety measures implemented during the whole project. To further safeguard your property, the crew will install protective coverings within your home before they begin to access the roof in order to install the roof lanterns.
The removal of the old roof covering to make room for your roof lanterns is the most dramatic part of the installation process. Attaining and maintaining weathertightness throughout this phase calls for expert craftsmanship. Skilled installers will carefully limit the amount of time your property is left exposed to the elements. In the event that bad weather conditions arise, they will frequently employ temporary coverings. While installing roof lanterns, many homeowners worry that it may rain. However, professional teams keep a close eye on weather forecasts and adjust their work schedules accordingly.
Cutting into roof timbers and installing steelwork or engineered timber beams to support the structural opening for roof lanterns are required. The first inspection by the building control inspector will usually be of this structural work to ensure compliance with building requirements. The installation crew will take great care to determine the load-bearing requirements and check that the existing roof structure can handle the weight of the roof lanterns as well as any snow or wind loads. The proper installation of roof lanterns relies on this structural strength.
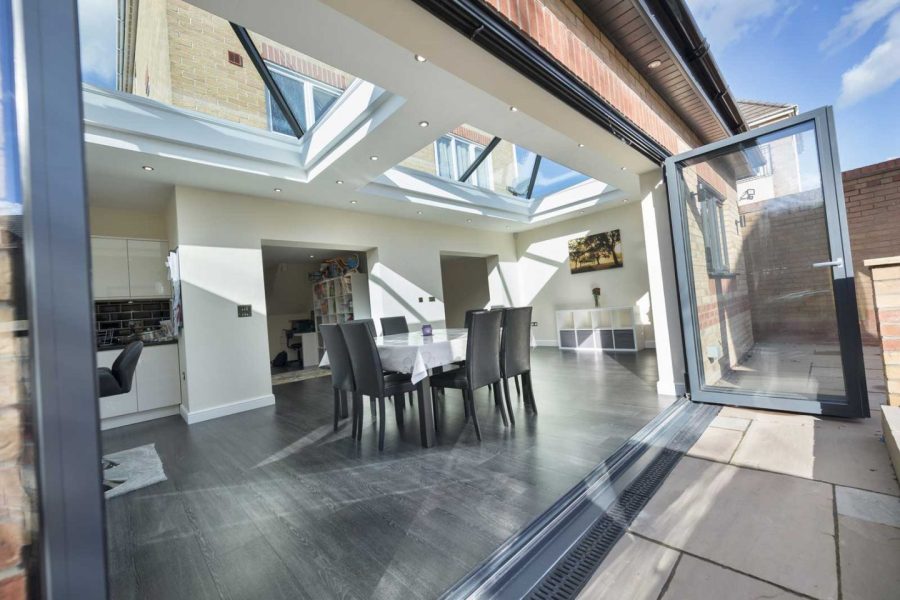
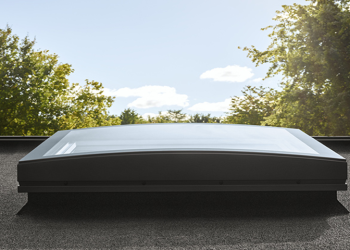
The roof lanterns can be installed once the structural opening is ready. Complete units of modern roof lanterns are usually placed, with great care, by lifting them into place and securing them to the prepared kerb or upstand. In order to facilitate water drainage and weather resistance, the kerb elevates the roof lanterns above the level roof surface. As you eagerly await the placement of your roof lanterns, you can’t help but marvel at the way they will alter the look of your property’s roofline and the amount of natural light they will illuminate your interior areas.
Careful planning is required to waterproof roof lanterns. To stop water from seeping in, specialised flashings and seals are put in around the outside. These must be fitted precisely according to the manufacturer’s instructions. The roof lanterns will be thoroughly sealed on the inside by the installation crew, who will also fill and complete any spaces that exist between the frame and the structural aperture. The effectiveness of roof lanterns over time depends on this weatherproofing, which stops draughts, humidity, and water from getting inside.
The installation of the roof lanterns is followed by the interior finishing work. It is necessary to build and finish the reveal between the ceiling and the roof lanterns. Usually, skimming smooth plasterboard is used for this task. In order to get the most light from your roof lanterns into the chamber below, you should install an interior light shaft or tunnel. While some homeowners like vertical sides, others opt for exposes extended outwards to maximise light spread. Depending on your taste in interior design, you have a variety of finishing options to choose from for the reveals surrounding roof lanterns.
Installing electrically controlled roof lanterns with built-in curtains or opening vents may necessitate further electrical work. If your roof lanterns have any electrical components, a licensed electrician should be present throughout the installation. The electrician will wire the area and install the control switches, making sure everything is up to code. Although they make installation more complicated, remote-controlled roof lanterns provide great convenience for controlling ventilation and sun gain.
The last steps in installing roof lanterns include meticulous inside and exterior finishing work. It is necessary to repair and waterproof the external roofing materials surrounding the roof lanterns. Before decorating, make sure the interior plastering is finished and dried. The materials may settle in the weeks after installation, which could cause some small cracking that will need to be touched up. Once the roof lanterns and their frameworks have settled into place, this is a common occurrence.
The last official stage in installing roof lanterns is the building control inspection. After the construction is finished, the building control officer will come to check if everything followed the approved plans and building codes. Upon completion, they will provide you with a completion certificate—a crucial document for keeping track of your property. In order to prove that the roof lanterns were erected legally and safely, you may be asked to provide this certificate when you decide to sell your property.
You will require some time to acclimatise to the newly modified location when the installation crew leaves and your roof lanterns are finished. Particularly in previously dark spaces, the enhanced natural light from roof lanterns can be extremely startling. To get the most out of the increased illumination that roof lanterns give, many homeowners discover they have to rethink their interior lighting, furniture arrangement, and even décor selections. Natural light changes with the seasons will also be more noticeable, with sunrise and sunset being the most spectacular times to use roof lanterns.
Roof lanterns don’t require much upkeep, but you should still clean them regularly and check the flashings and seals for damage. You can clean most roof lanterns with regular glass cleaners from the inside, but if you have any trouble getting to the outside, you might need to call a professional. If you check the weatherproofing surrounding your roof lanterns on a regular basis, you can catch problems before they become major headaches.
To sum up, installing roof lanterns is a big deal that need for meticulous preparation, official green light, and expert hands. The procedure may cause some inconvenience to your house, but the improvements you will see are well worth the inconvenience. You can confidently embark on your roof lantern installation when you know what to expect at each step, from the initial survey to the final inspection. This will ensure that your space is beautifully lit and that your property’s functionality and value are enhanced for years to come.


